Cook with CoffeeMilk Family
Search results
44 results found with an empty search
- Amritsari Kulcha
Amritsari Kulcha: A Flaky Delight from Punjab Amritsari Kulcha is a beloved North Indian bread, originating from the culinary hub of Amritsar, Punjab. Known for its crispy exterior and soft, stuffed interior, this dish is a testament to Punjab’s rich food heritage. Typically stuffed with spiced potatoes, onions, or paneer, the kulcha is baked in a tandoor until golden and flaky. Its irresistible flavor and texture make it a favorite for food lovers worldwide. The Legacy of Amritsari Kulcha Amritsari Kulcha is deeply tied to the vibrant streets of Amritsar, where it has been a staple for generations. This dish encapsulates the region's tradition of bold flavors and indulgent ingredients. Its name is synonymous with authenticity, and it has become a hallmark of Punjabi cuisine, enjoyed across India and beyond. How Amritsari Kulcha is Made The preparation begins with a soft dough made from all-purpose flour, yogurt, and ghee for a rich, tender base. The filling—typically a mix of boiled, spiced potatoes, onions, coriander, and green chilies—is sealed inside the dough. Flattened and sprinkled with sesame seeds or ajwain, it is then baked in a tandoor, creating its iconic flaky layers and smoky flavor. Perfect Pairings for Amritsari Kulcha This bread is traditionally served with chole (chickpea curry), a tangy pickle, and a cooling yogurt-based raita or mint chutney. These accompaniments balance the kulcha’s rich, buttery profile, creating a wholesome and satisfying meal. A drizzle of melted butter over the freshly baked kulcha adds a luxurious finish. Variations to Savor While the potato-stuffed version remains the classic choice, modern takes include paneer-filled kulchas for a creamy texture, onion kulchas for a tangy twist, and even mixed vegetable or cheese-stuffed options to cater to diverse palates. These variations add a contemporary flair to a traditional dish. Instruction Video Why Amritsari Kulcha is Special Amritsari Kulcha is not just a dish; it’s an experience of flavors and traditions. Whether enjoyed at a bustling dhaba or made at home, it represents the heart of Punjabi hospitality and culinary artistry. Its universal appeal makes it a must-try for anyone exploring authentic Indian cuisine. A Street Food Classic with Global Appeal Amritsari Kulcha has transcended its roots as a humble street food to become a celebrated dish worldwide. Its appeal lies in the perfect combination of flaky texture and bold, spiced fillings. Served hot and fresh, it is a favorite in Punjabi households and Indian restaurants across the globe, making it a must-try for anyone exploring Indian cuisine. A Dish for Every Occasion Whether for a festive meal, a weekend brunch, or a quick indulgence, Amritsari Kulcha suits any occasion. Its versatility means it can be paired with rich curries for a lavish feast or enjoyed simply with yogurt and pickles for a lighter snack. The dish brings joy to both casual dining and special celebrations. The Role of the Tandoor in Authenticity Traditionally, Amritsari Kulcha is cooked in a tandoor, which imparts its signature smoky flavor and crispy edges. The high heat creates the perfect texture—soft and airy on the inside, golden and flaky on the outside. This method of preparation connects the dish to its cultural roots, highlighting the artistry of Indian cooking. Ingredients: 2,5 cup Wheat flour 4 tbsp Joghurt 2,5 tbsp Öl 3,5 cups Water ½ tsp baking Powder 1/4 tsp baking Soda 1 tsp Salt Preparation: Mix the Dry Ingredients : In a large mixing bowl, combine the wheat flour, baking powder, baking soda, and salt. Mix well to evenly distribute the leavening agents. Incorporate Yogurt and Oil : Add the yogurt and oil to the dry mixture. Stir gently until the mixture begins to resemble coarse crumbs. Add Water Gradually : Slowly pour in the water while kneading. Continue kneading for 8–10 minutes until you achieve a soft, smooth dough. Rest the Dough : Cover the dough with a damp cloth and let it rest for at least 1–2 hours. This helps the dough become elastic and easy to work with. Divide the Dough : After resting, divide the dough into equal-sized balls. Roll each ball into a smooth shape, ready for stuffing or rolling into kulchas. Place 1–2 tablespoons of the filling in the center. Seal the edges, reshape into a ball, and gently roll it out into a flatbread about 1 cm thick. Sprinkle sesame or nigella seeds on top and press them gently into the dough. Heat a heavy, flat pan ( Tawa ) over medium heat. Let it preheat well before placing the kulcha on it. Place the kulcha on the hot pan with the seeded side facing up. Cook for about 1–2 minutes until the underside starts to develop golden spots. Flip the kulcha and cook the other side for another 1–2 minutes. Optional: If you have a gas flame, use tongs to hold the kulcha directly over the flame for a few seconds to create the signature "tandoor" texture and a smoky flavor. Once cooked, brush the hot kulcha generously with butter. Keep it warm in a kitchen towel while preparing the rest. Amritsari Kulchas are best served hot straight from the pan. Pair them with spicy Chole (chickpea curry), Dahi (yogurt), or tangy pickles. Tips for Perfect Kulchas on the Tawa/Pan Let the Dough Rest: The longer the dough rests, the softer and more pliable the kulcha will be. Roll Evenly: Roll the kulcha evenly to ensure it cooks uniformly and doesn’t tear. Control Pan Heat: The pan should be hot but not excessively so, to achieve golden-brown kulchas without burning. FAQ's. Find all your Answers about Amritsari Kulcha here 1. What is an Amritsari Kulcha? An Amritsari Kulcha is a traditional Indian stuffed bread originating from Amritsar, Punjab. It is typically filled with spiced potatoes, baked in a tandoor, and brushed with butter for a crispy, flaky texture. 2. Can I make Amritsari Kulchas without a tandoor? Yes! You can easily make them in an electric oven or on a pan ( Tawa ). Both methods produce delicious kulchas with a slightly different texture but the same great taste. 3. What are common fillings for Amritsari Kulchas? The classic filling includes spiced mashed potatoes mixed with onions, coriander, and aromatic spices. You can also try variations like paneer, mixed vegetables, or even minced meat for a non-vegetarian option. 4. What can I serve with Amritsari Kulchas? Amritsari Kulchas are traditionally served with Chole (spicy chickpea curry), tangy pickles, and Dahi (yogurt). A side of tamarind or mint chutney also enhances the flavors. 5. How do I ensure the filling doesn’t leak out while rolling the kulcha? To prevent the filling from leaking: Ensure the filling isn’t too wet. Seal the dough tightly after stuffing it. Roll the kulcha gently to avoid tearing the dough. 6. Can I make gluten-free Amritsari Kulchas? Yes! Substitute all-purpose flour with gluten-free flour, such as a mix of buckwheat or sorghum flour, for the dough. Adjust water and binding agents like psyllium husk for better elasticity. 7. How can I store leftover kulchas? Wrap cooked kulchas in foil or an airtight container and store them in the refrigerator for up to 2 days. Reheat them on a pan, in the oven, or microwave before serving. 8. Can I freeze Amritsari Kulchas? Yes, you can freeze them! Par-cook the kulchas until they are slightly puffed but not browned. Cool them completely, wrap them in foil, and freeze. When needed, cook them fully on a pan or in the oven. 9. What makes Amritsari Kulchas different from regular parathas? Amritsari Kulchas are made with leavened dough (with baking powder/soda or yeast), giving them a soft, flaky texture. They are traditionally baked in a tandoor, unlike parathas, which are cooked on a griddle with layers of fat. 10. Can I make the dough in advance? Absolutely! Prepare the dough and let it rest in the refrigerator for up to 24 hours. Let it come to room temperature before rolling and cooking. 11. What spices are essential for the filling? The essential spices for the potato filling include cumin powder, garam masala, chaat masala, red chili powder, and salt. These create the signature tangy and spicy flavor of Amritsari Kulchas. 12. How can I make the kulchas healthier? Use whole wheat flour instead of all-purpose flour. Brush the kulchas lightly with olive oil instead of butter. Use a non-stick pan to minimize the use of oil while cooking. 13. Why is my kulcha not fluffy? If your kulchas aren’t fluffy, it could be because: The dough didn’t rest long enough. The pan or oven wasn’t hot enough. The kulchas were rolled too thin. 14. Can I use store-bought naan dough for kulchas? Yes, store-bought naan dough can work as a shortcut. However, homemade dough ensures the authentic Amritsari flavor and texture. 15. Are Amritsari Kulchas vegetarian? Yes, the traditional recipe is vegetarian, using a potato-based filling. However, non-vegetarian variations can be made by using fillings like minced chicken or mutton. Enjoy experimenting with these flavorful kulchas while making them perfectly suited to your preferences! This recipe is really quick and easy to make and is guaranteed to be a success! So what are you waiting for? Try it out today! Your, CoffeeMilk Family
- Aloo Paratha's
Aloo Paratha: A Classic Indian Breakfast Staple Aloo Paratha, a quintessential North Indian dish, is a stuffed flatbread made with whole wheat flour and filled with a flavorful potato mixture. Known for its comforting taste and versatility, it is a popular choice for breakfast, lunch, or dinner. Served with butter, yogurt, or pickles, this dish is beloved by families across India and beyond. The Origins of Aloo Paratha Hailing from the northern regions of India, particularly Punjab, Aloo Paratha reflects the hearty and rich flavors of Punjabi cuisine. Traditionally cooked on a tava (flat griddle) and generously smeared with ghee or butter, it symbolizes the warmth and hospitality of Indian households. How Aloo Paratha is Made The process starts with preparing a soft dough using whole wheat flour, water, and a pinch of salt. The stuffing is made by mashing boiled potatoes and mixing them with spices like cumin, coriander, chili powder, and garam masala. The dough is rolled out, filled with the spiced potato mixture, and then sealed and rolled again into a flat disc. It is cooked on a hot griddle until golden brown, with a drizzle of ghee or oil for that signature crispy exterior. Perfect Pairings for Aloo ParathaA Dish for All Occasions Whether it’s a leisurely Sunday breakfast or a quick dinner option, Aloo Paratha fits any occasion. It’s also a popular travel food, as it stays fresh for hours and can be enjoyed without elaborate accompaniments. Its simplicity and taste make it a favorite comfort food for many. Instruction Video A Dish for All Occasions Whether it’s a leisurely Sunday breakfast or a quick dinner option, Aloo Paratha fits any occasion. It’s also a popular travel food, as it stays fresh for hours and can be enjoyed without elaborate accompaniments. Its simplicity and taste make it a favorite comfort food for many. Tips for the Perfect Aloo Paratha Soft Dough : Knead the dough well and let it rest for at least 30 minutes for pliability. Flavored Stuffing : Adjust the spices in the potato mixture to your liking—add green chilies for extra heat or amchur (dried mango powder) for tanginess. Cook on Medium Heat : Ensure even cooking by keeping the heat medium to avoid burning while ensuring the filling is warmed through. Generous Ghee : A drizzle of ghee while cooking enhances flavor and texture. Why Aloo Paratha is Special Aloo Paratha is more than just food—it’s a symbol of Indian comfort and culinary tradition. Its balance of wholesome ingredients, rich flavors, and ease of preparation has made it a staple across generations and a beloved dish worldwide. A Global Favorite with Local Charm While Aloo Paratha is deeply rooted in Indian tradition, its universal appeal has made it a global favorite. Indian restaurants worldwide serve this delicious flatbread, often introducing slight variations to cater to local tastes. Yet, the dish retains its authentic heart—a delightful combination of spiced potatoes and soft bread. Regional Variations Across India, Aloo Paratha sees regional twists in its preparation. In Punjab, it is loaded with butter and served with lassi, while in Delhi, street vendors add unique chutneys to elevate the flavor. In some parts of South India, people pair it with spicy coconut chutney for a fusion touch. Making It Your Own One of the best things about Aloo Paratha is its versatility. Home cooks can experiment by adding grated cheese, chopped herbs, or even leftover vegetables to the filling. For a healthier version, whole wheat flour can be combined with other grains like oats or millet, ensuring the dish suits a variety of dietary preferences. Ingredients: 8 eggs, boiled Sauce: 2 tsp oil 2 onions, sliced 1 inch cinnamon 3 - 4 green chilies 8 - 10 garlic cloves ¼ cup cashews Salt to taste 1 bundle coriander leaves ¼ cup water Frying Eggs: 1 tsp tumeric powder 1 tsp coriander powder 1 tsp garam masala Seasoning Sauce: 1 tsp oil 1 tsp red chili powder 1 tsp pepper powder 1/2 tsp haldi 1/2 tsp garam masala 1 tsp roasted jeera powder Salt 1 tbsp kasoori methi 1 cup dahi 1/4 cup cream Prepare the Dough in a bowl, combine whole wheat flour and salt. Gradually add water and knead until the dough is soft and smooth. Cover and set aside for at least 30 minutes. Mash the boiled potatoes and add the cumin seeds, garam masala, chili powder, coriander powder, green chilies, and chopped fresh coriander. Mix everything well until you have a smooth, well-seasoned filling. Divide the dough into equal-sized balls. Roll out each dough ball into a small disc. Place a spoonful of the potato mixture in the center, fold the edges of the dough around the filling, and seal it. Gently roll the stuffed dough ball into a flat disc again. Heat a tawa or griddle on medium-high heat. Place the rolled-out paratha on the hot tawa and cook until bubbles appear on the surface. Flip it over and cook the other side. Apply ghee or oil on both sides and cook until golden brown and crispy. Serve the freshly made Aloo Parathas hot with yogurt, pickle, or a dollop of butter. Enjoy this delicious, comforting dish for breakfast, lunch, or dinner! A Timeless Comfort for Every Meal Aloo Paratha is more than just a meal; it’s a connection to India’s rich culinary tradition and a dish that brings people together. Its deliciously spiced filling and soft, warm bread make it the perfect comfort food for any time of day. Whether enjoyed at a family gathering, a festive celebration, or as a quick snack, Aloo Paratha continues to be loved by people of all ages, offering both comfort and flavor in every bite. If you love traditional Indian flavors and comforting, hearty meals, you have to try making Aloo Paratha. This classic dish combines a spiced potato filling inside a soft, whole wheat bread that's crispy on the outside. Whether enjoyed for breakfast, lunch, or dinner, it’s perfect with butter, yogurt, or tangy pickles. Give it a try and bring a taste of India into your kitchen! Your, CoffeeMilk Family
- Soft Palak Paneer Paratha
A Flavorful Spin on Traditional Paratha Palak Paneer Paratha is a delicious and nutritious twist on the classic Indian flatbread, paratha. Combining the goodness of spinach (palak) and the richness of paneer (Indian cottage cheese), this paratha is packed with flavor and can be enjoyed as a hearty breakfast or lunch. The spinach adds a vibrant green color and earthy taste, while the paneer provides a creamy texture, making it a perfect fusion of taste and health. The Origins of Palak Paneer Paratha Palak Paneer is a beloved dish in Indian households, often served with rice or flatbreads like roti. The concept of adding paneer and spinach to a paratha takes this combination to the next level. While the paratha itself has roots in the northern parts of India, the addition of palak and paneer brings together two popular ingredients, making it a modern favorite. Its delicious, slightly spicy flavor makes it a staple in various Indian households, especially during the winter months when spinach is in season. The Nutritional Benefits of Palak Paneer Paratha Palak (spinach) is loaded with essential nutrients, including iron, calcium, and vitamins, making this dish a nutritious addition to any meal. Paneer is rich in protein and calcium, making it an excellent choice for vegetarians. Combined, these ingredients make Palak Paneer Paratha not just delicious, but also healthy, offering a great balance of carbohydrates, protein, and micronutrients. It’s a perfect choice for a fulfilling breakfast or a light lunch. Perfect Pairings for Aloo ParathaA Dish for All Occasions Whether it’s a leisurely Sunday breakfast or a quick dinner option, Aloo Paratha fits any occasion. It’s also a popular travel food, as it stays fresh for hours and can be enjoyed without elaborate accompaniments. Its simplicity and taste make it a favorite comfort food for many. Instruction Video Tips for Perfect Palak Paneer Paratha Use Fresh Spinach: For the best taste and vibrant color, use fresh, tender spinach. Avoid overcooking it to retain its nutrients. Paneer Texture: Crumbling or grating the paneer ensures it blends well with the dough and helps maintain a soft texture. Adjust Spice Levels: You can adjust the heat of the paratha by varying the amount of chili powder or garam masala used. Exploring the Varieties of Paneer Paneer, the star ingredient in Palak Paneer Parathas, is a fresh, non-aged cheese commonly used in Indian cooking. However, not all paneer is the same. Homemade paneer is often preferred for its freshness and smoother texture, as it is made by curdling milk with lemon juice or vinegar. It has a soft, crumbly texture and a mild flavor that complements the spices in dishes like Palak Paneer. On the other hand, store-bought paneer is typically firmer, making it easier to crumble into the paratha filling. The quality of paneer can vary greatly depending on the region and the method of preparation. For example, Punjabi paneer is known for being more firm and dense, while South Indian paneer is often softer and more moist. Some regions also add different flavoring agents to their paneer, like turmeric, to give it a vibrant yellow color, enhancing the dish's visual appeal. Which is the right Atta for Paratha? When making Palak Paneer Paratha, the type of flour (atta) you use plays a significant role in the texture and flavor of the paratha. The most commonly used flour is whole wheat flour, known for its rustic, nutty taste and high fiber content, making it a nutritious option for paratha dough. In some regions, multi-grain flour or bajra (pearl millet) flour is used, adding a different depth of flavor and making the parathas even more wholesome. Jowar flour (sorghum) is also a popular alternative in southern and western India, lending a slight sweetness to the dough. The choice of flour can impact the consistency of the dough and the final texture of the paratha, so experimenting with different types of flour can lead to a more personalized dish. How to Make Palak Paneer Paratha Making Palak Paneer Paratha is fairly simple and requires just a few ingredients. Here's a step-by-step guide: Ingredients: Filling: 1 cup Spinach (Palak), finely chopped 1/2 cup Paneer, crumled or grated 1 tsp Chaat Masala 1 tsp Salt 1 tsp Ginger Paste 1 Coriander Powder ¼ tsp Ajwain (optional) 1/2 tsp Black Salt 1 tsp red Chili Powder 2 Green Chilies 1 red Onion, finely chopped 1-2 tbsp fresh Coriander, finely chopped ¼ tsp Tahin Paste (optional) 1 tsp coriander powder Roti Dough: 500 g Roti Flur 300 - 350 ml Water Wash the spinach thoroughly and finely chop it. If the spinach is very wet, drain the excess water to prevent the filling from becoming too moist. In a large bowl, combine the chopped spinach with crumbled or grated paneer, chaat masala, salt, ginger paste, coriander powder, ajwain (if using), black salt, red chili powder, green chilies, onion, fresh coriander, and tahini paste (optional). Mix well until all the ingredients are evenly distributed. In a large bowl, mix the roti flour with a pinch of salt. Gradually add water and knead until the dough is soft, smooth, and elastic. The dough should not be sticky, nor should it be too firm. If the dough is too sticky, add a little more flour; if it is too dry, add a bit more water. Cover the dough with a damp cloth and let it rest for about 20 minutes, which will make it easier to roll out. Divide the dough into small balls. Flatten each dough ball on a lightly floured surface and roll it into a small circle (about 4–5 cm in diameter). Place a generous spoonful of the prepared spinach-paneer mixture in the center of the rolled dough. Gently fold the edges of the dough over the filling to seal it completely. Be careful not to let the filling spill out. Gently press the stuffed dough ball and roll it out into a larger flatbread (about 15 cm in diameter). Make sure the filling doesn’t escape while rolling. Heat a tawa or a flat frying pan over medium heat. Place the rolled paratha onto the hot pan and cook for about 1-2 minutes, until small bubbles form on the top. Flip the paratha and cook the other side. Add a little ghee or oil on the top side of the paratha, then flip it again, cooking both sides until golden brown and crispy. This should take about 2-3 minutes per side, depending on the heat. Repeat the process for the remaining parathas. Keep the cooked parathas warm by wrapping them in a cloth. Serve the warm Palak Paneer Parathas with yogurt, pickle, or raita. They also pair perfectly with a vegetable curry or dal (lentil dish) for a delicious and wholesome meal. Additional Tips: Use Fresh Spinach for Maximum Flavor Fresh spinach (palak) not only imparts a vibrant green color to the parathas but also a richer flavor. Avoid using frozen spinach, as it tends to have a more watery texture, which can make the filling too moist. If you must use frozen spinach, make sure to squeeze out any excess water before mixing it with the paneer to prevent the dough from becoming soggy. Let the Dough Rest for a Soft Texture Allow the dough to rest for at least 20 minutes after kneading. This resting period helps the gluten relax, making the dough easier to roll out and ensuring the parathas are soft and pliable. If you have the time, letting the dough rest for an hour will give you even better results, as it will be smoother and easier to handle. Don’t Overstuff the Paratha While it can be tempting to add a generous amount of filling, overstuffing the paratha can make it difficult to seal the edges properly and may cause the dough to tear. A heaping tablespoon of filling per paratha is usually enough. Be sure to evenly distribute the filling and seal the edges tightly before rolling it out to avoid any leakage during cooking. Cook on Medium-High Heat for Crispiness To get the perfect crispy texture, cook your Palak Paneer Parathas on medium-high heat. If the heat is too low, the parathas may become soft or soggy, and if it’s too high, they may burn on the outside while remaining uncooked on the inside. A medium-high flame ensures that the parathas cook evenly and develop a golden-brown, crispy crust while staying soft on the inside. Regional Variations of Palak Paneer Paratha While Palak Paneer Parathas are widely enjoyed across India, regional variations offer a fascinating glimpse into the diversity of Indian cuisine. In Punjab, the parathas are typically larger and have a slightly thicker texture, often served with a dollop of butter and a side of tangy yogurt or pickle. In Gujarat, Palak Paneer Parathas might be made with a touch of sugar or jaggery in the filling to balance the spiciness with a hint of sweetness, reflecting the state's preference for sweet-savory dishes. In South India, the use of rice flour or ragi flour (finger millet) in the dough imparts a unique flavor and texture, and the parathas are often paired with coconut chutney. In Maharashtra, the dough might include coriander powder or garam masala, adding a different aromatic depth to the paratha. These regional variations offer a new way to enjoy the same dish, showcasing the local ingredients and culinary preferences. FAQ's Find all your Answers about Palak Paneer Paratha here: 1. What is Palak Paneer Paratha? Palak Paneer Paratha is an Indian flatbread made with a filling of spiced spinach (palak) and paneer (Indian cottage cheese). The filling is wrapped inside the dough and then rolled out into a paratha. It’s a healthy and flavorful dish commonly served for breakfast, lunch, or dinner with yogurt or pickle. 2. Can I use frozen spinach for Palak Paneer Paratha? While fresh spinach is preferred for its flavor and texture, you can use frozen spinach if necessary. Make sure to thaw it and squeeze out any excess water to avoid making the dough too soggy. Fresh spinach will provide a better color and taste in the filling. 3. Can I make Palak Paneer Paratha without paneer? Yes, you can make a vegetarian version of this paratha using tofu as a substitute for paneer. Tofu gives a similar texture, though the taste will differ slightly. You can also use other soft cheeses if paneer isn't available. 4. Can I prepare the dough in advance? Yes, you can prepare the dough in advance. Allow it to rest for at least 20 minutes to make it easier to roll out. If you want to make it ahead, cover the dough with a damp cloth or plastic wrap and store it in the refrigerator for up to 24 hours. Allow it to come to room temperature before using. 5. How do I prevent the filling from spilling out while rolling the paratha? To avoid the filling spilling out, be sure not to overstuff the paratha. A tablespoon or two of filling should be enough. Seal the edges of the dough tightly around the filling and roll the paratha gently. If needed, lightly dust the dough with flour while rolling to prevent it from sticking. 6. What flour should I use for the dough? The most common flour used for making the dough for Palak Paneer Paratha is whole wheat flour (atta), which gives the parathas a hearty texture. You can also experiment with multigrain flour, bajra (pearl millet), or jowar (sorghum) flour for a more nutritious or regional twist, though whole wheat flour is the most traditional choice. 7. Can I freeze Palak Paneer Parathas? Yes, you can freeze Palak Paneer Parathas. After cooking, allow them to cool completely, then stack them with parchment paper in between and store them in a freezer-safe bag or container. To reheat, simply heat them on a tawa or griddle until warm, or pop them in the microwave for a few seconds. 8. How can I make the paratha spicier? To make the paratha spicier, you can add chopped green chilies or red chili powder to the filling. Adjust the spice level based on your personal preference. Additionally, you can add some garam masala or chaat masala for extra flavor. 9. Can I make Palak Paneer Paratha without ghee or butter? Yes, you can make the paratha without ghee or butter if you’re looking for a lighter version. You can opt to cook the paratha using a small amount of oil instead or even skip the fat entirely. If you prefer a healthier option, you can also brush it with olive oil. 10. What can I serve with Palak Paneer Paratha? Palak Paneer Parathas are usually served with yogurt (dahi), pickle, and raita. You can also pair them with a spicy chutney (like mint or tamarind chutney) or serve them alongside a vegetable curry or dal for a complete meal. 11. Can I add other vegetables to the filling? Yes, you can add other vegetables to the filling for more texture and flavor. Carrots, peas, or corn can be grated and mixed into the spinach and paneer filling. However, ensure the vegetables are cooked or well-drained to avoid excess moisture. 12. How do I store leftover Palak Paneer Parathas? Store leftover Palak Paneer Parathas in an airtight container or wrap them in foil. They can be kept at room temperature for up to 1 day or refrigerated for 2–3 days. To reheat, warm them in a pan or microwave for a few seconds. 13. Can I make Palak Paneer Paratha gluten-free? Yes, you can make gluten-free Palak Paneer Parathas by using a gluten-free flour blend (such as rice flour, sorghum flour, or a store-bought gluten-free atta). The texture may differ slightly from traditional whole wheat parathas, but the flavor and filling will still be delicious. If you love traditional Indian flavors and comforting, hearty meals, you have to try making Palak Paneer Paratha. Whether enjoyed for breakfast, lunch, or dinner, it’s perfect with butter, yogurt, or tangy pickles. Give it a try and bring a taste of India into your kitchen! Your, CoffeeMilk Family
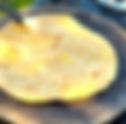
- Idli & Dosa Batter | No Rice | No Rava
A Healthier Take on a South Indian Classic When it comes to iconic South Indian cuisine, idli and dosa stand tall as two of the most beloved dishes. Traditionally made with rice and lentils, these light and fluffy idlis and crispy dosas can now be recreated in a healthier, grain-free version using just three simple ingredients: urad dal, mung dal, and salt. This blog will explore the origin of idlis and dosas, the many variations of these dishes, popular accompaniments, and tips to achieve the perfect batter. The Origins of Idlis and Dosas Idli and dosa are integral to South Indian cuisine, with their history tracing back hundreds of years. Idli: Often referred to as "steamed cakes," idlis are traditionally made with a fermented rice and urad dal batter. Their origin is debated, but many believe the concept of steaming originated in Tamil Nadu, Karnataka, or even from ancient Indonesian culinary practices. Dosa: Known for its thin, crispy texture, dosa is a pancake-like dish that evolved as a versatile and filling meal in South Indian homes. Its origins can also be traced to Tamil Nadu, with references in ancient Tamil Sangam literature. Both dishes are celebrated for their simplicity, ease of digestion, and ability to pair with an array of accompaniments. Different Types of Idlis and Dosas Idli Variations: Classic Idli: Steamed and fluffy, these are the most common form of idlis. Mini Idlis: Smaller, bite-sized idlis often served with sambhar for dipping. Ragi Idli: Made by adding ragi (finger millet) flour to the batter, a healthier variation. Stuffed Idli: Filled with spiced vegetables, chutneys, or even paneer for a creative twist. Kanchipuram Idli: A spiced version made with dry fruits, cumin, and ginger. Dosa Variations: Plain Dosa: The most common version, served crispy and golden brown. Masala Dosa: Stuffed with a spiced potato filling, it's a worldwide favorite. Rava Dosa: Made with semolina (rava) for a crispy, lace-like texture. Neer Dosa: A delicate and thin dosa from Karnataka made without fermentation. Pesarattu: Made with mung beans, this dosa is a high-protein alternative. Cheese Dosa: A modern adaptation featuring melted cheese, popular with kids. Instruction Video Accompaniments for Idlis and Dosas The beauty of idlis and dosas lies in their adaptability to pair with a wide range of sides: Chutneys: Coconut chutney, tomato chutney, mint chutney, and peanut chutney are common favorites. Sambhar: A tangy and spiced lentil stew made with vegetables like drumstick, carrots, and beans. Podi: A dry, spiced lentil powder mixed with ghee or oil, adding a burst of flavor. Kurma or Curry: Vegetable kurma, chickpea curry, or potato stew can provide a heartier pairing. Tips for Perfect Idli & Dosa Batter Soaking Time : Ensure proper soaking of lentils for easy grinding and better fermentation. Fermentation : A warm environment is key for good fermentation. In colder climates, place the batter in an oven with the light on or wrap the bowl in a blanket. Consistency : For idlis, the batter should be thick; for dosas, it should be slightly thinner. Tawa Prep : For dosas, always use a hot and seasoned tawa to prevent sticking. Grease it lightly before each dosa. Experiment : Add grated carrots, chopped spinach, or spices to the batter for added flavor and nutrition. Health Benefits of No Rice, No Rava Batter Using urad dal and mung dal as the base makes this batter a healthier choice: High Protein: Packed with plant-based protein, it's ideal for vegetarians and vegans. Low Carb: Eliminating rice reduces carbohydrate content, making it suitable for low-carb diets. Gut-Friendly: Fermentation enhances probiotics, aiding digestion. Gluten-Free: Perfect for those with gluten intolerance or sensitivity. Why This Recipe is a Game-Changer This rice-free, rava-free version of idli and dosa batter retains all the beloved qualities of traditional recipes while catering to modern dietary preferences. It's versatile, nutritious, and just as delicious, making it a fantastic addition to your meal repertoire. Ingredients: 1 cup Urad Dal 1 cup Mung Dal Salt Instruction: Wash the urad dal and mung dal thoroughly and soak them together in water for minimum 1 hour. Drain the soaked lentils and blend them into a smooth batter, adding water gradually. The consistency should be thick but pourable. Transfer the batter to a large bowl, cover it loosely, and let it ferment overnight (8–12 hours) in a warm place. The batter will rise and develop a slightly sour aroma. After fermentation, mix the batter gently and add salt to taste. This batter can be used for both idlis and dosas: For idlis , steam the batter in idli molds for 10–12 minutes until cooked. For dosas , spread a ladleful of batter thinly on a hot tawa and cook until crispy. See the Instructions Video for help Additional Tips: 1. Using Oil or Ghee for Cooking: For Dosas: A small amount of oil or ghee is recommended for crispy dosas. Use a brush or a paper towel to spread a thin layer on the tawa before pouring the batter. This helps the dosa cook evenly and prevents sticking. For a healthier option, you can skip oil if using a non-stick tawa or a well-seasoned cast iron pan. For Idlis: Grease the idli molds with a little oil or ghee before pouring in the batter. This ensures that the idlis release smoothly after steaming. 2. Tawa Preparation for Dosas: Always heat the tawa well before adding the batter. To test if it’s ready, sprinkle a few drops of water—if they sizzle and evaporate quickly, the tawa is at the right temperature. After making each dosa, wipe the tawa with a damp cloth to cool it slightly and remove residue. This helps in spreading the next dosa smoothly. 3. Steam Perfect Idlis: Avoid overfilling the idli molds; leave some space for the batter to rise while steaming. Use a lid to cover the steamer tightly and ensure the water in the steamer doesn’t touch the bottom of the molds. Let the idlis cool for a minute after steaming before removing them from the molds to prevent them from sticking or breaking. 4. Batter Consistency Tips: For dosas, if the batter is too thick, dilute it with a little water for easy spreading. Always stir the batter before pouring each dosa to ensure an even consistency. For idlis, the batter should hold its shape but still flow slightly. Overly thick batter may result in dense idlis. 5. Fermentation Tips: If the batter doesn’t ferment well, you can add a pinch of fenugreek seeds ( methi ) while soaking the lentils, as they help enhance fermentation. Avoid over-fermenting the batter in warm climates, as it may turn too sour. 6. Resting the Batter: Before making dosas, let the fermented batter sit for 5–10 minutes after adding salt. This helps balance the flavors and ensures even cooking. 7. Avoid Batter Waste: If you have leftover batter, store it in an airtight container in the refrigerator for up to 3 days. You can also use it to make other dishes like uttapam (thick dosa with toppings) or paniyaram (savory fritters). 8. Enhancing Flavors: For dosas, sprinkle finely chopped onions, green chilies, or grated carrots on top while the dosa is cooking for added texture and flavor. For idlis, mix grated vegetables like carrots or finely chopped spinach into the batter for a nutritious twist. 9. Managing Sticky Batter: If your dosa sticks to the pan, ensure the tawa is properly seasoned or non-stick. You can also rub a halved onion or potato over the tawa’s surface before adding oil for better results. 10. Cooking Multiple Idlis or Dosas: For large batches, ensure you have enough water in the steamer to maintain consistent steam for all idli molds. When making dosas, keep the batter cool between batches to prevent it from thinning out too quickly due to heat from frequent stirring. FAQ's Find all your Answers about Palak Paneer Paratha here: 1. Can I skip fermentation for the batter? No, fermentation is essential for achieving soft idlis and crispy dosas. It not only enhances the texture but also develops the tangy flavor and boosts the nutritional value of the batter by introducing probiotics. 2. Why are my idlis hard and dense? Hard idlis usually result from thick batter or insufficient fermentation. Ensure the batter has risen well during fermentation and has a light, airy consistency. Adding a little water to the batter before steaming can also help. 3. My dosas are sticking to the pan. What can I do? Sticking can happen if: The tawa is not hot enough. The batter consistency is incorrect (too thick or too watery). The pan isn’t seasoned properly. Use a well-seasoned cast iron pan or a non-stick tawa. Wiping the pan with a halved onion or a damp cloth can also help. 4. Can I store the batter, and for how long? Yes, you can store the batter in an airtight container in the refrigerator for up to 3 days. Ensure the container is large enough to allow room for the batter to expand slightly, as it may continue to ferment. Stir the batter well before use. 5. Can I use this batter for other recipes? Absolutely! This batter is versatile and can be used to make: Uttapam : Thick dosas topped with vegetables. Paniyaram : Savory fritters cooked in an appa chatti or paniyaram pan. Dhokla-style Idlis : Add turmeric and ginger to the batter for a Gujarati-inspired twist. 6. Can I add rice or rava to this batter if needed? Yes, if you want a more traditional idli or dosa, you can add soaked and ground rice or a small amount of rava (semolina) to the fermented batter. This will slightly alter the texture but still work well. However, the no-rice, no-rava version is healthier and just as delicious. Whether you enjoy them for breakfast, lunch, or dinner, idlis and dosas are timeless dishes that can be tailored to suit your taste and health goals. Experiment with toppings, sides, and textures to create your perfect version. Happy cooking! Your, CoffeeMilk Family
- Christstollen | soft & tasty like from Grandma
A Timeless German Christmas Tradition Christstollen, also known simply as Stollen, is a beloved German Christmas bread that has graced festive tables for centuries. This rich, fruit-filled treat symbolizes abundance and celebration, making it an integral part of holiday traditions. Whether prepared with quark or yeast, each variation has its unique charm, offering something special for every taste.. Working Time 25 Min. Baking Time 60 Min. Level easy The rum-flavoured quark stollen is a great alternative if you don't have much time during Advent to bake a time-consuming yeast stollen. Or if you want a quick change from the biscuits. Recipe from Andrea The Origins and Tradition of Christstollen Christstollen has its roots in Saxony, particularly in the city of Dresden, where it was first mentioned in 1474. Known as Striezel in its early days, it was initially a simple bread baked during Advent, reflecting the austere food traditions of the time. Over the centuries, the recipe evolved, becoming richer with the addition of butter, sugar, dried fruits, nuts, and spices. The shape of the Stollen is symbolic, resembling the swaddled Christ Child. Dresden even celebrates its own Stollenfest every December, honoring the city’s cherished connection to this festive bread. Quark Stollen vs. Yeast Stollen: A Tale of Two Doughs Quark Stollen Quark Stollen is a lighter, faster alternative to the yeast-based version. The use of quark (a soft, tangy cheese) gives the dough a moist texture and a subtle tang, making it softer and more cake-like. It doesn’t require long proofing times, which is ideal for those seeking a quicker yet equally delicious Stollen. Yeast Stollen Traditional yeast Stollen relies on fermentation to develop its flavor. The dough is enriched with butter, sugar, and milk, and requires time to rise. The result is a bread with a slightly chewy texture and a rich, complex taste that deepens as it rests. Yeast Stollen is more traditional and is often the choice for purists who value the classic preparation methods. Instruction Video 7 Tips for Baking the Perfect Christstollen Soak the Fruits: Always soak dried fruits, such as raisins and currants, in rum, brandy, or orange juice overnight. This not only plumps them up but also infuses the Stollen with deep, festive flavors. Use High-Quality Ingredients: Opt for real butter, aromatic spices like cardamom and cinnamon, and premium marzipan for authentic taste. Handle the Dough with Care: For yeast Stollen, don’t over-knead the dough. For quark Stollen, ensure the ingredients are well-incorporated but avoid overmixing. Shape the Stollen Correctly: The iconic folded shape represents the Christ Child wrapped in cloth. Flatten the dough slightly, fold one side over the other, and press gently to create the classic form. Low and Slow Baking: Bake your Stollen at a lower temperature to ensure it cooks evenly without drying out or burning. Rest for Flavor: Stollen improves with time. Wrap the baked bread in foil or wax paper and let it rest for at least 1–2 weeks in a cool place before serving. This allows the flavors to meld beautifully. Dust Generously with Sugar: A thick coating of powdered sugar not only adds sweetness but also acts as a preservative, keeping the bread moist. Christstollen Serving Suggestions Stollen pairs beautifully with a warm cup of mulled wine ( Glühwein ) or a festive tea. Slice it thinly and serve as part of a Christmas breakfast spread or as a dessert alongside other seasonal treats like gingerbread cookies and spiced nuts. Celebrate Tradition with Your Perfect Stollen Whether you choose the classic yeast version or the quick and tender quark Stollen, this iconic bread is a celebration of heritage, flavor, and festivity. By following the tips above, you can create a Christstollen that not only honors tradition but also becomes a cherished part of your own holiday memories. Working time Baking Time Niveau 25 Min 1 h simple Ingredients: 500 g Wheat Flour 1 sachet Baking powder 4 drops of lemon peel flavoring, (lemon oil) or zest of one lemon 1 bottle of rum flavoring 4 drops of bitter almond flavoring 2 eggs 150 g almonds, ground 175 g Sugar 175 g Butter 1 msp. mace 1 msp Cardamom Powder 1 sachet Vanilla Sugar 250 g Quark 250 g Raisins 100 g candied lemon peel, very finely chopped 50 g Butter powdered Sugar Preheat the Oven: 170 Degrees Baking Time: 90 Min Instruction: Prepare the Dry Ingredients In a large mixing bowl, sift together the flour and baking powder. Add the ground almonds, sugar, vanilla sugar, mace, and cardamom powder. Mix thoroughly to combine the dry ingredients evenly. Incorporate the Wet Ingredients In a separate bowl, whisk the eggs, quark, softened butter, lemon peel flavoring (or zest), rum flavoring, and bitter almond flavoring until smooth and creamy. Combine the Mixtures Gradually add the wet mixture to the dry ingredients. Using your hands or a sturdy spatula, mix everything together until a soft dough forms. Add the Fruits Gently fold in the raisins and finely chopped candied lemon peel, ensuring they are evenly distributed throughout the dough. Shape the Stollen Transfer the dough onto a floured surface. Shape it into a flattened oval, approximately 3 cm thick. Fold one side over the other to create the classic Stollen shape. Bake the Stollen Place the shaped dough onto a parchment-lined baking sheet. Bake in the preheated oven at 170°C for 90 minutes. Check the Stollen after 60 minutes; if it starts browning too quickly, cover it loosely with aluminum foil. Brush with Butter Once baked, remove the Stollen from the oven and immediately brush it generously with melted butter while it is still hot. Let the bread cool slightly. Dust with Powdered Sugar When the Stollen has cooled, liberally dust it with powdered sugar to create a thick, sweet coating. This not only enhances the flavor but also helps preserve the bread. See the Instructions Video for help Tips for Serving Resting Period: For best results, wrap the cooled Stollen in foil or wax paper and let it rest for 1–2 days before serving. This allows the flavors to mature beautifully. Serving Suggestion: Slice thinly and serve with tea, coffee, or mulled wine for a festive treat. Enjoy your homemade Quarkstollen as a delightful centerpiece to your holiday celebrations! FAQ's Find all your Answers about Christstollen here: 1. What is the difference between Quarkstollen and traditional yeast Stollen? Quarkstollen uses quark instead of yeast as the primary leavening agent, resulting in a softer, more cake-like texture. It also doesn’t require long proofing times, making it quicker to prepare compared to traditional yeast-based Stollen, which has a chewier, bread-like consistency. 2. Can I substitute quark with another ingredient? Yes, if quark is not available, you can substitute it with Greek yogurt or cream cheese (preferably full-fat) for a similar texture and tangy flavor. However, quark gives the best authentic results. 3. How long does Quarkstollen stay fresh? Quarkstollen stays fresh for about 1–2 weeks when stored properly. Wrap it tightly in foil or wax paper and keep it in a cool, dry place. For extended freshness, you can freeze it for up to 3 months. 4. Can I add other dried fruits or nuts to the recipe? Absolutely! While raisins and candied lemon peel are traditional, you can customize your Quarkstollen with dried cranberries, cherries, chopped dates, or even pistachios and walnuts for added variety and flavor. 5. Why do I need to brush the Stollen with butter and dust it with powdered sugar? Brushing the Stollen with butter helps lock in moisture, while the powdered sugar coating acts as a preservative and adds a signature sweetness. This combination not only enhances the flavor but also helps the bread stay moist and fresh for longer. Enjoy your homemade Quarkstollen as a delightful centerpiece to your holiday celebrations! Your, CoffeeMilk Family
- Advocado Salad | Indian-Inspired Spicy | for busy Days
Avocado salad takes on a bold and exciting twist with this Indian-inspired recipe, blending the creamy goodness of avocado with the tangy, spicy flavors of Indian cuisine. Perfect for any occasion, this vibrant dish is a fantastic way to enjoy fresh ingredients with a unique and delicious flair. Working Time 10 Min. chopping Time 5 Min. Level easy This Indian-inspired avocado salad is an ideal choice when you’re short on time but still want a fresh, nutritious meal. With minimal preparation and just a few ingredients, it can be ready in under 15 minutes. Recipe from Andrea Versatile for Different Diets and Preferences This salad is not only quick and flavorful but also versatile enough to suit various dietary needs. Naturally vegetarian and gluten-free, it can easily be made vegan by avoiding optional dairy toppings. For those on low-carb diets, it’s a refreshing and satisfying choice that fits seamlessly into a healthy lifestyle. Whether you enjoy it as a side dish or a light main course, this salad is a unique blend of Indian-inspired flavors that will please any palate. A Quick Fusion Dish for Every Occasion This Indian-inspired avocado salad is more than just a side—it’s a reflection of how global ingredients can merge beautifully with Indian spices and traditions. The spicy kick from green chilies, the zesty tang of lemon, and the earthy touch of coriander bring together a dish that is vibrant, refreshing, and unforgettable. It’s perfect for casual meals, parties, or when you simply want to add an Indian twist to your salad repertoire. Why This Salad is Perfect for Any Occasion Nutrient-Rich : Packed with vitamins, antioxidants, and healthy fats, it’s as nutritious as it is delicious. Quick and Easy : Ready in under 15 minutes, this salad is perfect for busy days or impromptu gatherings. Customizable : Adjust the spice level, add cucumbers, or sprinkle some toasted nuts for extra crunch. Instruction Video The Ingredients That Make It Special This avocado salad brings together fresh, wholesome ingredients with bold spices for an unforgettable flavor profile: Avocado : Creamy and full of healthy fats, avocado forms the base of this salad. Red Onion : Adds a crunchy, slightly pungent bite. Tomatoes : Juicy and refreshing, tomatoes add balance to the richness of avocado. Green Chilies and Red Chili Flakes : A fiery kick for spice lovers. Garlic : For a robust and savory depth. Coriander : Brightens the dish with its fresh, herbal aroma. Chaat Masala : The secret spice that adds a tangy, savory complexity. Salt and Lemon Juice : Enhance the flavors and add a zesty finish. 3 Tips for the Best Avocado Salad Choose the Right Avocado : Use ripe but firm avocados for the perfect balance of creaminess and structure. Serve Immediately : Avocados tend to oxidize, so it’s best to serve the salad as soon as it’s prepared. Control the Spice : For a milder version, reduce the number of green chilies or skip the red chili flakes. Working time Chopping Time Niveau 10 Min 5 h easy Ingredients: 1 avocado 1 red onion, finely chopped 2 tomatoes, diced 1 tbsp coriander, finely chopped 2 green chilies, finely chopped 2 cloves garlic, minced 1 tsp chaat masala 1 tsp salt 1 tbsp lemon juice 1/2 tsp red chili flakes Instruction: Prep the Ingredients : Dice the avocado and tomatoes into bite-sized pieces, finely chop the red onion, coriander, and green chilies, and mince the garlic. Mix the Base : In a large mixing bowl, combine the avocado, onion, tomatoes, green chilies, and coriander. Season and Spice : Add the minced garlic, chaat masala, salt, and red chili flakes. Drizzle with fresh lemon juice. Toss Gently : Using a spoon or spatula, gently toss the salad to coat all ingredients evenly. Serve Fresh : Transfer to a serving dish and enjoy immediately for the best flavor and texture with some Roti, Naan or any other nice Bread of your Choice. See the Instructions Video for help Enjoy your Advocado Salad | Indian-Inspired Spicy for busy Days! Your, CoffeeMilk Family
- Shimla Mirch | Easiest way to make
A Simple Dish with Regional Significance Shimla Mirch Ki Sabji , or bell pepper curry, is a popular vegetarian dish in India, especially known for its vibrant, mild flavor. While it’s enjoyed across the entire country, it's most commonly prepared in regions like Punjab, Uttar Pradesh, and Gujarat. These regions, with their rich history of vegetarian cuisine, incorporate bell peppers into various dishes, often combining them with spices and ingredients native to these areas. In Punjab, for example, Shimla Mirch is often cooked with a blend of onions, tomatoes, and a variety of local spices, resulting in a flavorful and comforting dish. Meanwhile, in Gujarat, bell peppers may be paired with slightly sweeter flavors, reflecting the region’s penchant for sweet-spicy combinations. Working Time 20 Min. Baking Time 45 Min. Level easy Shimla Mirch Ki Sabji is a quick dish of roasted bell peppers with Indian spices. Oven-roasting adds smoky depth, making it perfect for busy days. Pair it with roti, naan, or rice for a wholesome, easy meal. Recipe from Andrea Adaptability Across Indian Regions While Shimla Mirch Ki Sabji has its roots in the North and West of India, the dish is adaptable and can easily be tweaked according to regional preferences. For example, in the southern regions like Kerala or Tamil Nadu, this dish may be given a different twist by adding coconut milk or curry leaves to infuse a distinct South Indian flavor. In contrast, in the North, especially in Punjabi cuisine, it is common to use ghee and a rich combination of garam masala for deeper flavors. These regional variations make this dish not only a staple in various parts of India but also allow for creativity in the kitchen, catering to different taste profiles.. Health Benefits and Versatility in Cooking | Easy and quick Another reason Shimla Mirch Ki Sabji is widely loved is its health benefits. Bell peppers, or Shimla Mirch, are rich in vitamins A and C, making them excellent for boosting immunity and promoting skin health. Combined with onions, garlic, and tomatoes, this dish becomes a nutrient-dense, low-calorie meal that is both filling and healthy. Whether you are cooking it for lunch or as a side dish for dinner, Shimla Mirch Ki Sabji can easily be customized. You can add extra vegetables like peas or potatoes for a heartier version or even pair it with proteins like paneer to elevate the dish. This flexibility makes it an easy, go-to option for anyone looking to make a quick, nutritious, and flavorful meal. With its simplicity, versatility, and robust flavor, Shimla Mirch Ki Sabji stands as a testament to the beauty of Indian vegetarian cooking. Whether you're a novice cook or an experienced chef, this dish provides an easy entry point into the world of Indian cuisine, offering both traditional and innovative ways to enjoy it. Instruction Video 3 Tips for Perfect Shimla Mirch with Tadka: Roasting Time : Keep an eye on the vegetables in the oven to prevent over-charring, but make sure they are well-roasted for the right texture. Adjusting Spice Levels : Feel free to increase or decrease the number of green chilies and the quantity of masalas based on your preferred spice level. Tadka Variation : You can also add a pinch of hing (asafoetida) to the tadka for a deeper, more savory taste. Working time Baking Time Niveau 20 Min 45 Min simple Ingredients: 4 medium bell peppers (Shimla Mirch), halved and deseeded 2 large onions, halved 3 ripe tomatoes, halved 6 garlic cloves, unpeeled 3 tbsp olive oil 1 tsp salt For the Tadka: 1 tbsp oil (vegetable or mustard) 1 large onion, finely chopped 2 green chilies, slit 1 tsp garam masala 1 tsp kitchen king masala 1 tsp coriander powder 1 tsp cumin powder Salt to taste Instruction: Roasting the Vegetables : Preheat the oven to 200°C (390°F). Wash and halve the bell peppers, onions, tomatoes, and garlic. Place them on a baking sheet, drizzle with olive oil, and sprinkle with salt. Roast the vegetables in the oven for 25-30 minutes until they are tender and develop a nice char. Preparing the Tadka : In a separate pan, heat the oil for the tadka. Add the finely chopped onions and sauté until golden brown. Toss in the slit green chilies and cook for another minute. Add the spices: garam masala, kitchen king masala, coriander powder, cumin powder, and salt. Stir well to release the aromas of the spices. Combining : Once the roasted vegetables have cooled slightly, peel off the skins from the bell peppers and tomatoes. Keep the flesh, discard the skins, and place the flesh into a pot. Add the sautéed tadka mixture to the pot with the roasted vegetables. Stir well and simmer for a few minutes to allow the flavors to meld together. See the Instructions Video for help Tips for Serving This dish can be enjoyed with naan , roti , or rice . The smoky flavors from the roasted vegetables paired with the aromatic tadka create a beautiful fusion that’s both hearty and healthy. The use of the tadka adds the signature Indian flavor profile that will transport you straight to the heart of Indian kitchens. Enjoy your homemade Quarkstollen as a delightful centerpiece to your holiday celebrations! FAQ's Find all your Answers about Shimla Mirch | Easiest way to make | here: What makes Shimla Mirch Ki Sabji unique in Indian cuisine? Shimla Mirch Ki Sabji stands out for its simplicity and versatility. The dish highlights the natural flavors of bell peppers combined with a medley of Indian spices. It is a great example of how basic ingredients like onions, tomatoes, and garlic can create a hearty and flavorful meal. Can I make this dish without roasting the vegetables? Yes, you can prepare Shimla Mirch Ki Sabji without roasting. In the traditional method, the vegetables are sautéed directly in a pan. However, roasting adds a smoky flavor that enhances the taste of the dish. Is Shimla Mirch Ki Sabji spicy? The spice level can be adjusted according to your preference. While green chilies and garam masala contribute to the heat, you can reduce or omit these ingredients if you prefer a milder dish. What are some good pairings with Shimla Mirch Ki Sabji? This dish pairs wonderfully with Indian breads like roti , naan , or paratha . It also complements steamed rice or jeera rice for a simple yet satisfying meal. Can I add other vegetables or proteins to the recipe? Absolutely! Shimla Mirch Ki Sabji is versatile and can be enhanced with additional vegetables like potatoes, peas, or carrots. You can also add paneer or tofu for extra protein. How long can Shimla Mirch Ki Sabji be stored? This dish can be stored in an airtight container in the refrigerator for up to 2-3 days. Reheat it on the stove or in the microwave before serving, adding a splash of water if needed to adjust the consistency. Shimla Mirch Easiest Way To make! This Shimla Mirch with a tadka twist is a quick, flavorful dish that pairs beautifully with Indian breads and rice, making it perfect for both casual meals and festive occasions. The roasted vegetables add a unique depth of flavor, while the tadka gives it a traditional Indian touch, creating a balanced, satisfying dish! Your, CoffeeMilk Family
- Pyaz ki Sabzi | Onions with Green Peas
A Simple, Flavorful Dish Pyaz Ki Sabzi , a humble yet flavorful Indian dish, combines onions and green peas with a medley of aromatic spices. Perfect for weeknight dinners, this quick and versatile recipe is deeply rooted in Indian home cooking, offering a burst of flavors in every bite. Working Time 8 Min. Cooking Time 15 Min. Level easy Pyaz Ki Sabzi is a flavorful and versatile dish that perfectly balances the richness of onions with the vibrant taste of spices and peas. With its easy-to-follow steps, it’s a great option for both beginner and experienced cooks who want to enjoy a satisfying, vegetarian Indian meal. Recipe from Andrea The Essence of Pyaz Ki Sabzi | Onions with green Peas Onions are a staple ingredient in Indian kitchens, forming the base of many recipes. In Pyaz Ki Sabzi , however, onions take center stage, paired with green peas to create a vibrant, mildly sweet, and spicy dish. This recipe blends everyday spices like cumin, coriander, and garam masala, along with yogurt and besan (chickpea flour) for a creamy, rich texture. The addition of curry leaves and mustard seeds gives it a Southern Indian touch, making the dish aromatic and irresistible. Ingredients and Key Techniques The simplicity of Pyaz Ki Sabzi | Onions with green Peas lies in its preparation. Start by tempering cumin seeds, mustard seeds, and curry leaves in hot oil. These ingredients release their flavors into the oil, creating a flavorful base. Sauté thinly sliced red onions with green chilies and ginger-garlic paste, followed by a sprinkle of chickpea flour. This step thickens the dish while adding a nutty aroma. Adding yogurt gives the sabzi a creamy consistency, while amchur powder (dry mango powder) lends a tangy twist. The green peas are simmered with just enough water to cook them tenderly, and the spices are balanced to complement the natural sweetness of the onions and peas. This dish is a perfect balance of textures and flavors—soft peas, slightly crunchy onions, and a thick, spiced gravy. Instruction Video 5 Tips for Perfect Pyaz Ki Sabzi Fresh Ingredients: Use fresh green peas for the best flavor. Frozen peas work well, but fresh ones enhance the taste and texture. Balance the Heat: Adjust green chilies and garam masala according to your spice preference. Prevent Curdling: When adding yogurt, ensure the pan is not too hot. Stir continuously to avoid curdling. Thickening with Besan: Add besan gradually and sauté it properly to avoid a raw taste. Customize: Feel free to add diced potatoes or bell peppers for variation. Why Pyaz Ki Sabzi Is a Must-Try This dish showcases the beauty of simple ingredients, turning onions and peas into a flavorful curry. It's quick to prepare, perfect for busy days, and versatile enough to fit into a variety of meals. Whether you’re a fan of North or South Indian cuisine, Pyaz Ki Sabzi offers a fusion of flavors that will appeal to your palate. Working time Cooking Time Niveau 8 Min 15 Min simple Ingredients: 3 red onions, thinly sliced 1 cup green peas (fresh or frozen) 1 tsp ginger-garlic paste 1 tbsp chickpea flour (besan) 2 tbsp yogurt 2 green chilies, slit 1.5 tsp salt (adjust to taste) 1 tsp garam masala 1 tsp cumin seeds 1 tsp black mustard seeds 1/2 tsp cumin powder 1/2 tsp coriander powder 1/2 tsp amchur powder (dry mango powder) 1/2 tsp Kitchen King Masala 10 curry leaves 2-3 cup Water (as needed for consistency) Oil (for cooking) Instruction: Prepare the Ingredients: Thinly slice the red onions and slit the green chilies. Finely chop the tomato. If using frozen green peas, defrost them. Roast the Chickpea Flour (Besan): In a small dry pan, add the chickpea flour. Roast it over low heat, stirring constantly, until it turns lightly golden and you can smell its nutty aroma. Set aside. Tempering the Spices: Heat oil in a pan. Add cumin seeds, black mustard seeds, and curry leaves. Let them crackle and become aromatic. Add Tomato, Paste, and Spices: Add the chopped tomato to the pan along with ginger-garlic paste. Stir in the coriander powder, cumin powder, garam masala, Kitchen King Masala, salt, and amchur powder. Cook this mixture until the tomatoes soften and the oil begins to separate. Add Onions and Green Peas: Add the sliced onions and green peas to the pan. Stir well and cook until the onions are translucent and the peas are tender. Add 2-3 cups water if needed to prevent sticking. Incorporate the Roasted Chickpea Flour: Sprinkle the roasted chickpea flour over the mixture and stir well to combine. This will thicken the dish and add depth to the flavor. Add Yogurt and Fresh Coriander: Reduce the heat to low, then slowly stir in the yogurt to prevent curdling. Cook for 1-2 minutes until the yogurt blends into the gravy. Finally, sprinkle freshly chopped coriander over the dish for garnish and enhanced flavor. Serve: Serve hot with roti, naan, or steamed rice. Enjoy this delicious, easy-to-make dish! See the Instructions Video for help FAQ's Find all your Answers about Pyaz ki Sabzi here: Can I make Pyaz Ki Sabzi without green peas? Yes, green peas add sweetness and texture, but the dish works well without them. You can substitute them with other vegetables like diced bell peppers or cooked potatoes for variation. How can I ensure the yogurt doesn't curdle? To prevent curdling, lower the heat before adding the yogurt and stir it in gradually. You can also whisk the yogurt beforehand to make it smoother. Can I prepare this dish without chickpea flour? Chickpea flour thickens the gravy and adds a nutty flavor, but you can skip it or replace it with cornflour or a small amount of blended cooked lentils for a similar texture. What pairs best with Pyaz Ki Sabzi? This dish pairs beautifully with hot roti, naan, or even steamed rice. For a more indulgent meal, serve it with paratha or jeera rice. Can I make this dish ahead of time? Yes, Pyaz Ki Sabzi can be made ahead and reheated before serving. However, add fresh coriander just before serving for the best flavor and freshness. Happy cooking, and enjoy this delicious piece of Indian cuisine with your loved ones! Your, CoffeeMilk Family
- Apple Pastry | 3 Ingredients needed
A Quick and Delicious Dessert Apple Pastry is a simple yet delightful treat that combines the natural sweetness of apples with the flakiness of pastry dough. It’s an easy-to-make dessert that’s perfect for those days when you want something delicious but don't have a lot of time to spend in the kitchen. Whether you're using store-bought yeast dough or puff pastry, this recipe offers a shortcut to a mouthwatering dessert without compromising on flavor. Working Time 15 Min. Baking Time 15 Min. Level easy Apple Pastry is a quick and delicious treat that combines the natural sweetness of apples with the flakiness of puff or yeast dough. Simply slice apples, wrap them in dough, bake until golden, and finish with a dusting of powdered sugar and a cinnamon-sugar coating for extra flavor. Recipe from Andrea Perfect for All Occasions | Apple Pastry Whether you're hosting a party, enjoying a quiet afternoon, or baking for a family gathering, Apple Pastry is the perfect go-to dessert. It’s incredibly versatile and can be customized to suit your taste. Add a bit of vanilla extract to the dough, swap cinnamon for nutmeg, or try different apple varieties to give your pastries a unique twist. Plus, they make for an excellent last-minute treat when you have guests over or want to brighten up your day with something sweet. Why Apple Pastry is Perfect for Busy Days Apple Pastry is not only quick and easy to prepare, but it also requires minimal ingredients. You don’t have to worry about complex techniques or long baking times—simply wrap your apples in the dough and pop them in the oven. This makes it an ideal dessert for busy days when you want to create something impressive without spending hours in the kitchen. The combination of warm apples, flaky pastry, and the cozy scent of cinnamon will fill your home with a comforting aroma, making it a perfect treat for any occasion. Instruction Video 3 Tips for the Perfect Apple Pastry: Apple Selection: Choose apples that are slightly tart, like Granny Smith, for the best balance against the sweetness of the pastry. These apples hold their shape well when baked and add a bit of zing to the overall flavor. Dough Choices: Whether you use puff pastry or yeast dough is up to you, depending on your preference for texture. Puff pastry yields a crisp, flaky result, while yeast dough gives a slightly denser, chewier texture. Both are delicious, so feel free to try both. Serving Ideas: Serve these apple pastries with a scoop of vanilla ice cream or a drizzle of caramel sauce for an indulgent dessert. For a lighter option, enjoy them as is, paired with a hot cup of tea or coffee. Why Apple Pastry Is a Must-Try Apple Pastry is the ideal dessert for anyone who loves easy, comforting, and delicious treats. Using just a few simple ingredients and minimal effort, you can create a stunning dessert that’s sure to please everyone. With its light, flaky texture and the sweet-tart flavor of apples, it’s a perfect indulgence for any occasion. Working time Baking Time Niveau 15 Min 15 Min simple Ingredients: 2-3 medium-sized apples (Granny Smith or Braeburn are ideal) 1 package of pre-made puff pastry or yeast dough 2 tablespoons sugar (optional) 1 teaspoon ground cinnamon (optional) Powdered sugar for dusting Instruction: Prepare the Apples: Start by washing, peeling, and coring the apples. Slice them into thin rings, about 1/4 inch thick. You should aim for 4-6 slices per apple, depending on their size. Prepare the Dough: Roll out your puff pastry or yeast dough on a flat surface. Cut the dough into strips that will be long enough to wrap around each apple ring. If you're using puff pastry, try to roll it out to an even thickness for a uniform result. Assemble the Apple Pastry: Take each apple ring and wrap the dough strip around it, making sure to cover the entire apple. Gently press the dough to secure it in place, ensuring that it sticks well and will hold its shape as it bakes. Bake: Preheat the oven to 180°C (350°F) and line a baking sheet with parchment paper. Arrange the apple pastry rings on the sheet, leaving some space between each one. Bake for about 15-20 minutes or until the pastry turns golden brown and crispy. Finish and Serve: Once the pastries are out of the oven, let them cool slightly. Dust with powdered sugar for a light touch of sweetness. For an extra treat, roll the warm pastries in a cinnamon-sugar mixture to give them that signature warm, spiced flavor. See the Instruction Video for help FAQ's Find all your Answers about Apple Pastry here: 1. Can I use other fruits for this pastry? Yes, you can substitute apples with other fruits like pears, peaches, or even berries. Just ensure the fruits are not too watery, as they could affect the texture of the pastry. 2. Can I use a different type of dough? Absolutely! You can use puff pastry, phyllo dough, or even a pie crust for variety. Puff pastry will give a crispier texture, while pie crust will result in a more tender pastry. 3. How can I make the pastry healthier? To make the pastry healthier, you can reduce the sugar or use alternatives like stevia or honey. Opt for whole wheat pastry dough or a lighter puff pastry version to reduce calories. 4. How can I store leftover Apple Pastries? Store any leftovers in an airtight container at room temperature for up to 2 days. For longer storage, you can refrigerate them, but it’s best to enjoy them fresh. 5. Can I make the Apple Pastry in advance? Yes, you can prepare the apple filling and dough in advance, but it’s best to bake them just before serving to keep the pastry fresh and crispy. You can also freeze the unbaked pastries and bake them directly from the freezer when needed. The next time you need a quick yet impressive dessert, try making these delightful apple pastries—your taste buds will thank you! Your, CoffeeMilk Family
- Aloo ki Sabzi Pualo | A One-Pot Comfort Meal
Aloo Ki Sabzi Pualo is a flavorful, hearty dish that combines the wholesomeness of vegetables with aromatic basmati rice and a blend of Indian spices. This one-pot meal is a favorite for its simplicity and comforting flavors, making it a go-to dish for busy days or satisfying family dinners. Working Time 15 Min. Cooking Time 20 Min. Level easy Aloo Ki Sabzi Pualo is a versatile dish that shines in various settings. Whether it’s a casual family dinner, a festive gathering, or a meal prep option for the week, this pulao is a reliable choice. Recipe from Andrea The Origins of Aloo Ki Sabzi Pualo This dish draws inspiration from traditional Indian cuisine, where rice and vegetables are staples. It combines the essence of pualo (a spiced rice dish) with the rich flavors of aloo ki sabzi pualo (potato curry). The result is a versatile dish enjoyed across various Indian regions with slight variations, making it a celebration of both comfort and flavor. Why You’ll Love Aloo Ki Sabzi Pualo Quick and Easy : With everything cooked in one pot, this dish saves time and effort, making it perfect for busy schedules. Nutritious : Packed with vegetables and aromatic spices, it’s a wholesome meal that satisfies both taste and nutrition. Customizable : Add or swap vegetables based on availability and preference, like carrots, beans, or bell peppers. Family-Friendly : The mild, comforting flavors make it suitable for all ages. Instruction Video 4 Tips for the Perfect Aloo ki Sabzi Pualo: Rinse the rice thoroughly to remove excess starch for fluffier grains. Ensure the water ratio is correct for perfectly cooked rice. Stir gently after adding the rice to avoid breaking the grains. Adjust spice levels to your preference, adding more chilies for extra heat. Regional Connection This aloo ki sabzi pualo embodies the simplicity of North Indian home cooking. Commonly prepared in regions like Punjab and Uttar Pradesh, it reflects the focus on earthy spices and hearty ingredients typical of these areas. The addition of garam masala and cumin powder underscores its deep-rooted Indian flavors. Enhancing with Sides Pair Aloo Ki Sabzi Pualo with sides like boondi raita or tangy pickle for a complete meal. For an indulgent touch, drizzle some clarified butter (ghee) over the rice just before serving. These additions elevate the dish’s flavor profile, making it even more satisfying. Working time Cooking Time Niveau 15 Min 20 Min simple Ingredients: 2 potatoes (peeled and diced) 1 cup cauliflower florets 1 cup green peas 1.5 cups basmati rice 3 cups water 1 red onion (sliced) 2 garlic cloves (minced) 2 green chilies (sliced) 1 tsp cumin seeds 1.5 tsp salt 1.5 tsp garam masala 1/2 tsp cumin powder 1/2 tsp coriander powder 1 tsp turmeric powder 2 tbsp oil Instruction: Prep the Vegetables: Wash, peel, and chop the potatoes into small cubes. Cut the cauliflower into small florets and set aside the peas. Cook the Aromatics: Heat 2 tablespoons of oil in a large pot or pressure cooker. Add cumin seeds and let them crackle. Add sliced onions, garlic, and green chilies, sautéing until the onions turn golden. Add Vegetables and Spices: Toss in the diced potatoes, cauliflower, and peas. Sprinkle turmeric, cumin powder, coriander powder, salt, and garam masala. Stir to coat the vegetables evenly with the spices. Combine with Rice: Add the rinsed basmati rice to the pot and mix gently with the vegetable mixture. Pour in 3 cups of water and bring it to a boil. Simmer and Cook: Cover the pot and let the rice simmer on low heat until the water is absorbed, and the rice is tender. If using a pressure cooker, cook for 1-2 whistles. Fluff and Serve: Once cooked, let the pualo sit for 5 minutes before fluffing with a fork. Serve hot with yogurt, pickles, or a side of raita. See the Instructions Video for help FAQ's Find all your Answers about Aloo ki Subzi Pualo here: 1. Can I use brown rice instead of basmati rice? Yes, you can use brown rice. However, it will require a longer cooking time and additional water to cook thoroughly. Adjust the seasoning as needed. 2. What can I substitute for cauliflower? If cauliflower isn’t available, you can replace it with carrots, bell peppers, or beans for a similar texture and flavor. 3. Is this dish suitable for kids? Absolutely! You can reduce the amount of green chilies and garam masala to make it milder for younger children. 4. Can I make this pualo vegan? Yes, the dish is naturally vegan. Just ensure the yogurt or ghee you serve with it is plant-based if you want to maintain a vegan option. 5. How do I store and reheat leftovers? Store leftovers in an airtight container in the refrigerator for up to 2 days. Reheat in a microwave or a pan, adding a splash of water to prevent it from drying out. Enjoy this versatile and satisfying pualo, and make it your own by experimenting with different spices and veggies. Your, CoffeeMilk Family
- Moong Dal Kachori | A Crispy Delight
Moong Dal Kachori is a beloved Indian snack that combines a crispy outer shell with a spicy, flavorful moong dal filling. This North Indian delicacy is a popular choice for festive occasions, tea-time snacks, or family gatherings. With a satisfying crunch and a burst of spices in every bite, Moong Dal Kachori is a culinary treat that is hard to resist. Working Time 2 hrs. Cooking Time 45 Min. Level moderate Apple Pastry is a quick and delicious treat that combines the natural sweetness of apples with the flakiness of puff or yeast dough. Simply slice apples, wrap them in dough, bake until golden, and finish with a dusting of powdered sugar and a cinnamon-sugar coating for extra flavor. Recipe from Andrea The Legacy of Moong Dal Kachori This dish traces its roots to Rajasthan, where kachoris are a staple snack and street food. Over the years, variations have spread across India, with each region adding its unique touch. From spicy fillings to mildly flavored ones, kachoris offer endless possibilities. Moong Dal Kachori stands out for its protein-rich filling, making it both delicious and wholesome. The Art of Flavor Balancing in Moong Dal Kachori One of the defining features of Moong Dal Kachori is its intricate balance of flavors. The filling strikes a harmony between spicy, tangy, and earthy notes, with fennel seeds and ajwain adding a subtle aroma that complements the richness of the ghee-laden dough. To elevate the dish further, you can experiment with adding a hint of sweetness to the filling using a touch of sugar or raisins, providing a delightful contrast to the spices. This flexibility makes Moong Dal Kachori not just a snack but a canvas for culinary creativity. Instruction Video Moong Dal Kachori: A Global Favorite While deeply rooted in Indian culinary traditions, Moong Dal Kachori has gained international popularity, particularly in countries with a strong diaspora presence. Many chefs and home cooks have adapted the recipe to suit local palates by incorporating unique spices or using alternative flours for the dough. This adaptability, combined with its irresistible flavor and texture, has made Moong Dal Kachori a beloved snack far beyond the borders of India. 3 Tips for Perfect Moong Dal Kachori Achieving the Perfect Dough :Ensure the dough is soft and pliable, but not sticky. The ghee or oil needs to be well-incorporated into the flour before adding water. This step ensures the kachoris turn out crisp and flaky. Resting the dough helps gluten relax, making it easier to roll. Consistency of the Filling :After pureeing the dal and tomato spice mix, cook it until it becomes thick and dry. Any excess moisture can cause the kachoris to burst during frying. Cool the filling completely before using it. Frying Temperature :Maintain a medium-low frying temperature. Frying on high heat will cook the outer dough too quickly while leaving the inside raw. A consistent moderate heat ensures even golden browning and a crisp texture . Why Moong Dal Kachori is Perfect for Festive Gatherings Moong Dal Kachori’s festive appeal lies in its versatility and indulgent taste. Whether served as an appetizer at a Diwali celebration or part of a lavish Rajasthani thali, its crispy layers and spiced filling are a crowd-pleaser. Additionally, the dish can be made in advance and reheated, making it an excellent choice for entertaining. With a batch of kachoris on hand, you’re always prepared to impress guests with a timeless, delectable snack. Working time Cooking Time Niveau 2 hrs 45 Min moderate Ingredients: For the Dough 2 cups all-purpose flour (maida) ½ tsp salt ¼ cup ghee or oil ½ cup water (adjust as needed) For the Filling 1 cup moong dal, soaked for 3 hours 1 tsp fennel seeds 1 tsp cumin seeds 1 tsp ajwain 1 tsp red chili powder 2 tsp salt 1 tsp oil 1 cup tomatoes, finely chopped Instruction: Prepare the Dough : In a large mixing bowl, combine the all-purpose flour, salt, and ghee or oil. Rub the ghee into the flour until it resembles breadcrumbs. Gradually add water and knead into a soft, pliable dough. Cover and let it rest for 30 minutes. Cook the Moong Dal : Soak the moong dal in water for at least 2-3 hours. Drain and set aside. Make the Tomato-Spice Mixture : Heat 1 teaspoon of oil in a pan. Add fennel seeds, cumin seeds, and ajwain, letting them sizzle for a few seconds. Add chopped tomatoes, red chili powder, salt, and other spices (turmeric, cumin powder, and coriander powder). Cook until the tomatoes are soft and mushy. Blend the cooked tomatoes with the soaked moong dal into a coarse paste using a food processor or hand blender. Adjust consistency as needed. Prepare the Filling : Transfer the blended dal mixture back to the pan. Cook on low heat until the mixture thickens and the flavors meld together. Allow it to cool completely. Shape the Kachoris : Divide the dough into equal portions and roll into small discs. Place a spoonful of the filling in the center, gather the edges, and seal tightly. Flatten slightly with your palm. Deep-Fry the Kachoris : Heat oil in a deep pan on medium heat. Fry the kachoris in batches on low to medium heat until golden and crisp. Avoid frying on high heat to ensure even cooking. Serve : Drain excess oil on a paper towel. Serve hot with tamarind chutney, mint chutney, or yogurt for dipping. See the Instructions Video for help FAQ's Find all your Answers about Moong Dal Kachoris here: Can I use store-bought dough for Moong Dal Kachori? While traditional kachoris are made with homemade dough for the best texture and taste, you can use store-bought dough as a convenient alternative. However, ensure it has a high-fat content (like pastry dough) for a flaky result. What can I substitute for moong dal? If moong dal is unavailable, you can use urad dal or chana dal as substitutes. Adjust the soaking and cooking time accordingly, as they may require slightly different preparation. How do I make kachoris healthier? To make kachoris healthier, you can bake them instead of frying. Preheat the oven to 180°C (350°F), brush the kachoris with oil or ghee, and bake for 20-25 minutes or until golden brown. Can the filling be made in advance? Yes, you can prepare the filling up to a day in advance and store it in an airtight container in the refrigerator. Ensure it’s brought back to room temperature before stuffing the dough to avoid cracking. Why did my kachoris burst during frying? Kachoris may burst if the filling is too moist or if the dough is rolled too thinly. Make sure the filling is dry and the edges are sealed properly to prevent this issue. Moong Dal Kachori is a timeless snack that embodies the rich flavors and culinary artistry of Indian cuisine. Its combination of crispy, golden pastry and spiced lentil filling makes it a favorite for festive occasions, family gatherings, or simply to indulge in something comforting. The addition of the tomato-spiced filling puree brings a tangy twist, elevating the traditional recipe into something truly unique. Whether served with chutneys or enjoyed on its own, this dish is a delightful treat that brings people together with every bite. So, roll up your sleeves and bring the taste of India to your table! Your, CoffeeMilk Family
- Baumstriezel | Chrunchy like from the Christmasmarket
A Timeless tasty Christmas Tradition Baumstriezel, also known as chimney cake, is a traditional pastry with origins in Hungary and Romania. This delightful treat is renowned for its hollow, spiral shape and crispy yet fluffy texture. It’s perfect for festive occasions, street fairs, or as a comforting dessert at home. With a few simple ingredients, you can recreate this classic pastry using ready-made dough and a clever baking technique. Working Time 25 Min. Baking Time 60 Min. Level easy The rum-flavoured quark stollen is a great alternative if you don't have much time during Advent to bake a time-consuming yeast stollen. Or if you want a quick change from the biscuits. Recipe from Andrea What Makes Baumstriezel Special? Baumstriezel’s charm lies in its unique preparation. Traditionally cooked over open flames on a wooden spit, the dough develops a smoky aroma and caramelized crust. At home, you can mimic this method using a rolling pin wrapped in foil, resulting in a treat that's just as delicious. The pastry’s golden exterior is coated with melted butter and rolled in cinnamon sugar, creating a tantalizing blend of textures and flavors. The Origins of Baumstriezel Baumstriezel has a rich history, dating back to 17th-century Transylvania. Known as “kürtőskalács” in Hungary, this dessert was a staple at weddings and festivals. Today, it’s a beloved street food across Central Europe, particularly during Christmas markets. Each region has its spin, from nut toppings to a hint of vanilla in the dough. Why Make Baumstriezel at Home? Making Baumstriezel at home allows for creativity and personalization. It’s a fun activity for kids and adults alike, filling the kitchen with the aroma of warm cinnamon and butter. Plus, it’s quicker and simpler than you might expect when using ready-made dough. Instruction Video 3 Tips for Baking the Perfect Baumstriezel Experiment with Toppings: While classic Baumstriezel is coated with cinnamon sugar, there are endless possibilities for variations. For a nutty twist, you can roll the dough in chopped almonds, hazelnuts, or even shredded coconut. If you prefer a chocolatey finish, sprinkle the dough with cocoa powder before baking, or drizzle melted chocolate over the hot pastry once it’s out of the oven. This allows for a personalized treat that caters to different tastes and preferences. Perfecting the Technique: To get the Baumstriezel just right, it’s crucial to achieve an even wrap of the dough around the rolling pin. This will help ensure uniform baking and a crispy, caramelized exterior. When wrapping the dough, avoid pressing it too tightly; a slightly looser wrap allows the dough to expand during baking, creating the characteristic airy interior. Additionally, don’t forget to brush the dough with melted butter before rolling in sugar; this step is key to achieving that delightful, golden crust. Using Different Doughs: While ready-made yeast dough works well, you can experiment with different types of dough for your Baumstriezel. If you’re feeling adventurous, try using puff pastry for a flaky, buttery version that contrasts beautifully with the cinnamon sugar coating. Another option is to use a sweet yeast dough for a richer, more tender texture. Regardless of which dough you choose, be sure to adjust the baking time slightly to accommodate the dough’s thickness and moisture content. Temperature Control: Keep an eye on the oven’s temperature to avoid burning the outer layer before the dough inside is fully baked. If you notice the pastry getting too brown too quickly, you can reduce the heat slightly. Cooling the Dough: Allow the Baumstriezel to cool slightly before serving. This helps the cinnamon sugar to set and prevents a sticky mess when slicing. Make Ahead Option: If preparing Baumstriezel in advance, you can bake it a day ahead and reheat it in a 160°C (320°F) oven for about 5 minutes to revive its crispy texture. Creating Baumstriezel for Different Occasions Baumstriezel is not only a festive treat but also a versatile dessert for various occasions. It’s perfect for holiday gatherings, birthday parties, or even as a fun kitchen project for a rainy day. For an elegant presentation, you can serve it on a cake stand with powdered sugar dusted on top, or wrap it in parchment paper with a festive ribbon for a unique gift. Its delightful aroma and attractive spiral shape make it a guaranteed conversation starter at any gathering. Enjoying Baumstriezel with Friends and Family Baumstriezel is more than just a dessert; it’s a communal experience that brings people together. Whether you’re enjoying it warm straight from the oven or slightly cooled, it pairs wonderfully with a hot cup of coffee or tea. Sharing a Baumstriezel with friends or family makes for a cozy, memorable moment. Its sweet, crunchy exterior and soft, flaky interior are sure to satisfy anyone’s sweet tooth and leave a lasting impression. Working time Baking Time Niveau 25 Min. 10-12 Min. simple Ingredients: 1 package of ready-made yeast dough Melted butter (for brushing) Cinnamon sugar (for sprinkling) Instruction: Prepare the Baking Roller: Wrap a rolling pin or cylindrical object with aluminum foil. Brush the foil generously with melted butter to prevent sticking. Roll and Wrap the Dough: Roll out the ready-made yeast dough into a thin rectangle. Cut the dough into long strips, about 2 cm wide. Wrap these strips around the prepared rolling pin, overlapping slightly to form a seamless layer. Butter and Coat: Brush the wrapped dough with melted butter and roll it in a plate filled with cinnamon sugar, ensuring an even coating. Bake: Place the rolling pin on the edges of a baking tray so the dough doesn’t touch the base. Bake in a preheated oven at 180°C (350°F) for 15-20 minutes, rotating occasionally for even browning. Finish and Serve: Once golden brown, remove the Baumstriezel from the roller while it’s still warm. Sprinkle with extra cinnamon sugar if desired and enjoy fresh. See the Instructions Video for help 3 Tips for Serving Serve Fresh Out of the Oven : Baumstriezel is best enjoyed fresh out of the oven while the sugar is still warm and crispy. Serve it immediately to enjoy its full flavor and texture. The warm, caramelized exterior combined with the soft interior makes for an irresistible treat. Accompany with a Hot Beverage : Pair Baumstriezel with a hot beverage such as coffee, hot chocolate, or even mulled wine. The warm drink complements the sweetness and the crispy texture of the Baumstriezel perfectly. This makes it an ideal treat for winter gatherings or as a comforting snack. Serve with a Variety of Dips or Sauces : While Baumstriezel is delicious on its own, you can enhance the flavor by serving it with a variety of dips or sauces. Try it with a dusting of powdered sugar, chocolate sauce, caramel sauce, or even a light fruit compote. These additions can elevate the taste and offer different flavor experiences for guests. FAQ's Find all your Answers about Christstollen here: What is Baumstriezel? Baumstriezel is a traditional Austrian pastry that is known for its spiral shape and crispy, caramelized exterior. It’s made by wrapping a sweet yeast dough around a tapered roller, which is then slowly roasted over an open flame or in the oven. The outside is coated with cinnamon sugar, giving it a unique flavor and texture. How is Baumstriezel prepared? Baumstriezel is prepared by wrapping a sweet yeast dough around a wooden rolling pin or a specially designed metal cone. It is then brushed with butter and coated with cinnamon sugar before being roasted. The rotating motion helps achieve a crispy, even bake, and the spiral shape is achieved as the dough bakes and caramelizes. Can I make Baumstriezel without a special cone or rolling pin? Yes, while a special cone or rolling pin designed for Baumstriezel can help achieve the traditional shape, you can still make a similar pastry without them. You can use a round cake pan or any other mold to shape the dough and bake it similarly. Just ensure the dough is evenly spaced and that it can rotate or move during baking to achieve the crispy texture. Can Baumstriezel be made in advance? Yes, Baumstriezel can be made in advance. You can bake it ahead and store it in an airtight container for a couple of days. To revive the crispy texture, you can reheat it in the oven at around 160°C (320°F) for a few minutes. It can also be frozen after baking and reheated when needed. What are some variations of Baumstriezel? There are several variations of Baumstriezel, including chocolate-dipped, nut-coated, and even fruit-filled versions. For a festive twist, you can experiment with different coatings such as chopped almonds, shredded coconut, or cocoa powder mixed into the cinnamon sugar. These variations can be adjusted based on personal preference or the occasion. Enjoy your homemade Quarkstollen as a delightful centerpiece to your holiday celebrations! Your, CoffeeMilk Family